This forgotten trick turns ice cream sticks into a stunning tissue holder…
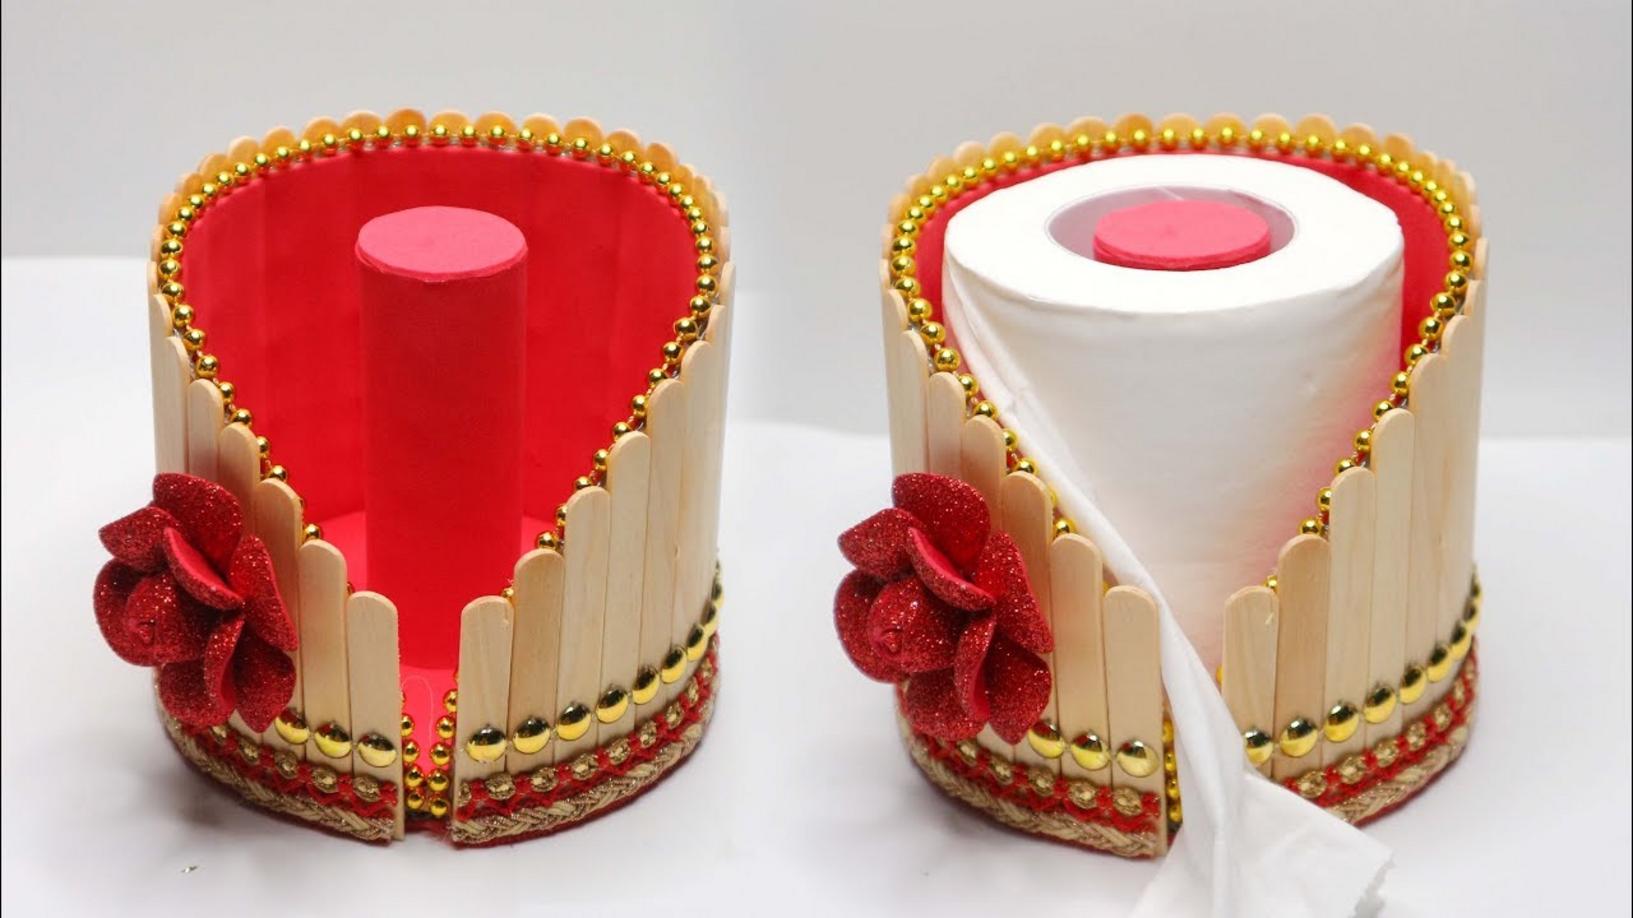
This Forgotten Trick Turns Ice Cream Sticks into a Stunning Tissue Holder
Transform Your Space with DIY Crafting
Are you ready to dive into a creative project that will not only decorate your space but also offer a practical solution? This guide reveals how **ice cream sticks** can be transformed into a beautiful **tissue holder**. Gather your crafting supplies and let your imagination flow as we embark on this fun-filled journey together!
Materials Needed
- Ice Cream Sticks
- Felt/Foam Fabric
- Cardboard
- Glitter Powder
- Lace
- Beads
Don’t forget to pick these items up online if you’re low on supplies! Check out the links for convenient shopping:
- Acrylic Flowers: https://shp.ee/nab9ed7
- Wool Thread: https://shp.ee/fqbqfcp
- Heart Foam: https://shp.ee/62vu4up
- Glitter Foam: https://shp.ee/yppda4p
… (and more)
Step-by-Step Instructions
Step 1: Prepare Your Base
Begin by cutting two pieces of cardboard to form the base and top of your **tissue holder**. The size should be slightly larger than the **tissue box** you intend to use. This will ensure a snug fit.
Step 2: Arrange the Ice Cream Sticks
Using hot glue, start attaching the **ice cream sticks** vertically along the sides of the cardboard. Leave small gaps between the sticks for a stylish look! This part is fun and allows you to express your creativity.
Step 3: Add Felt or Foam
Once the glue has dried, add a layer of felt or foam at the top and bottom edges for a soft touch. This not only adds beauty but also prevents any rough edges from showing.
Step 4: Embellish with Lace and Beads
Using lace and beads, enhance the design by gluing them along the edges. You can even create patterns for a personalized touch. Don’t be shy to mix and match your embellishments!
Step 5: Final Touches
For the final flourish, sprinkle some **glitter powder** on your creation to add glamour. Let everything sit for a while to ensure it’s firmly attached before placing your tissues inside.
Common Mistakes to Avoid
- Not letting glue dry properly: It’s important to ensure everything is properly adhered before moving to the next step.
- Overloading with decorations: Keep it simple! A few accents go a long way in ensuring the piece looks elegant.
- Ignoring measurements: Always measure your tissue box beforehand to create the perfect fit.
Get Creative and Share Your Results!
Now that you’ve crafted your stunning **tissue holder**, why not share it with friends and family? DIY projects not only beautify your home but also bring joy and pride in creation.
Try this out today, and let your creative juices flow! Don’t forget to tag us in your DIY photos on social media. For more ideas and inspiration, check our platforms, and keep crafting!
Happy crafting! 🌟