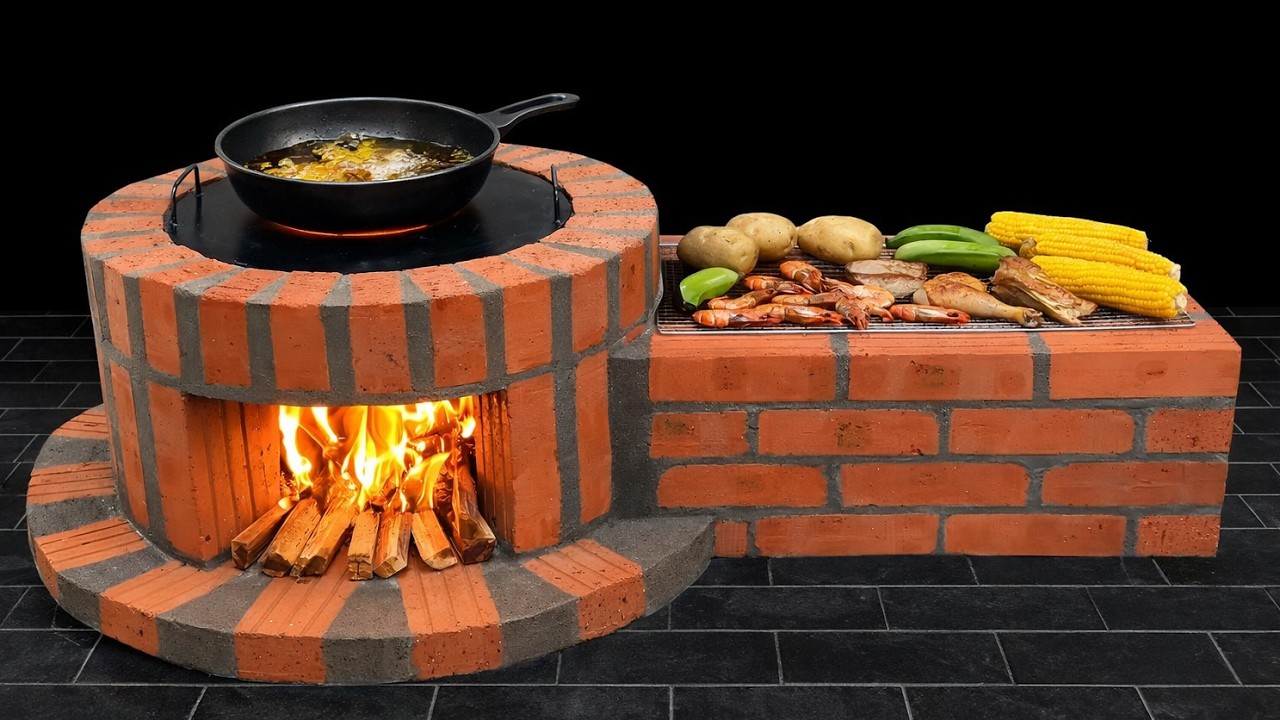
Create a Stunning 2-in-1 Wood Stove with Red Brick and Cement in 5 Easy Steps!
Create a Stunning 2-in-1 Wood Stove with Red Brick and Cement in 5 Easy Steps
- Introduction
- Required Materials
- Building Steps
- Personalizing Your Stove
- Common Mistakes to Avoid
- FAQ
Introduction
Have you found yourself longing for a cozy wood stove that not only adds warmth but also becomes a stylish focal point in your home? You might be feeling overwhelmed by the thought of building one, especially with so many options available. The idea of combining functionality with aesthetic appeal can seem daunting. However, with a clear guide and the right materials, you can create a stunning 2-in-1 wood stove that complements your space beautifully. Let’s explore how you can achieve this project without feeling lost in the process.
Required Materials
To craft your own 2-in-1 wood stove, gathering the right materials is essential. Here’s a comprehensive list you’ll need:
- Red bricks (approximately 100-150 depending on the design)
- Cement (ensure it’s suitable for high temperatures)
- Gravel for the base
- A shovel and mixing tub for cement
- Leveling tool
- Optional: decorative tiles or stone for finishing touches
Building Steps
Creating your wood stove can be an incredibly rewarding experience. Follow these five steps to successfully build your stunning piece:
1. Preparing the Base
Lay a solid foundation to ensure stability.
- Locate a flat area in your yard or patio where you want to install the stove.
- Use a shovel to create a level surface and lay down gravel to aid drainage.
2. Arranging the Bricks
Begin building the main structure using your red bricks.
- Starting from the corners, arrange bricks to form a rectangular shape.
- Check the level of each row with your leveling tool to ensure an even surface.
3. Mixing Cement
Your cement will hold everything together.
- In your mixing tub, combine cement with water according to the manufacturer’s instructions.
- Mix thoroughly until you achieve a smooth, workable consistency.
4. Securing the Structure
Now it’s time to add cement to your bricks.
- Apply cement between each brick as you layer them, ensuring they adhere properly.
- Continue layering bricks until the desired height is reached, taking care to keep it level.
5. Finishing Touches
Add personal flair and protection to your stove.
- Once the structure is complete, consider applying decorative tiles or stones around the outer edges.
- Allow the cement to cure fully, following the product instructions, before using your new wood stove.
Personalizing Your Stove
Enhancing the appearance and functionality of your stove can make it uniquely yours. Here are some ideas for personalization:
- Select unique tile patterns that reflect your style, whether rustic or contemporary.
- Incorporate shelves for wood storage, making it both practical and visually appealing.
- Consider adding a chimney or flue for improved ventilation and safety.
Common Mistakes to Avoid
When building your wood stove, avoiding certain pitfalls can save time and ensure quality. Keep these common mistakes in mind:
- Not using high-temperature cement: Regular cement may crack under heat.
- Neglecting proper ventilation: Ensure adequate airflow to prevent smoke buildup.
- Ignoring local regulations: Check guidelines regarding outdoor stoves to avoid fines.
FAQ
1. How long does it take for cement to cure?
The curing time can vary, but typically, it should set for at least 24-48 hours before it’s ready for use.
2. Can I use the stove indoors?
This stove is primarily designed for outdoor use, especially if it does not have a proper flue system for indoor air.
3. What should I do if it rains while building?
If possible, cover the structure with a tarp to protect the cement while it’s setting.
Conclusion
Building a stunning 2-in-1 wood stove with red brick and cement is a fulfilling DIY project that can enhance your outdoor living space. By following the steps outlined and personalizing your design, you can create a functional piece that reflects your taste. What features would you add to your stove to make it uniquely yours?