9 Steps to Build a Smokeless DIY Cement Rocket Stove for Camping Fun
Build a Smokeless DIY Cement Rocket Stove for Camping
- Introduction
- Required Materials
- Step-by-Step Instructions
- Tips and Tricks
- Common Mistakes
- FAQ
- Conclusion
Introduction
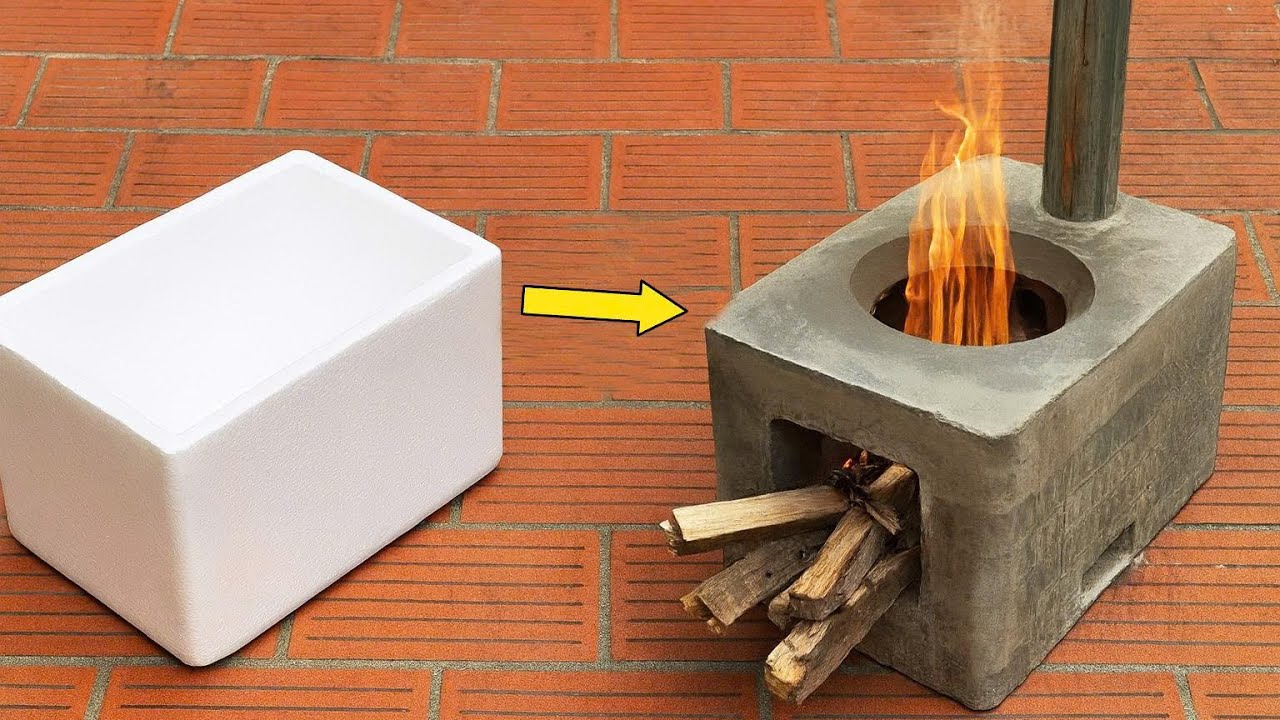
Picture yourself in the great outdoors, surrounded by nature, ready to cook a delicious meal over a warm fire. However, the smoke from traditional stoves can be irritating and harmful to the environment. You desire a more sustainable way to enjoy camping while minimizing smoke pollution. The good news is that with a little creativity and effort, you can create your very own smokeless rocket stove using simple materials. For those keen to learn more, keep reading to discover how to build this eco-friendly solution.
Required Materials
Gathering the right materials is crucial for constructing your smokeless DIY cement rocket stove. Here’s what you’ll need:
- Cement mix (1 bag, preferably quick-set)
- Water (to mix with cement)
- Wooden planks or cardboard (for making molds)
- Metal mesh or screen (for stability and airflow)
- Plastic bucket (to make your stove chamber)
- Shovel (for mixing cement)
- Protective gear (gloves, mask, goggles)
These materials are not only affordable but also easily accessible, ensuring you can get started without unnecessary hassle.
Step-by-Step Instructions
Now that you have the materials ready, let’s move on to the detailed steps for building your smokeless cement rocket stove:
- Prepare your molds: Using wooden planks or cardboard, create a rectangular base that will serve as the outer mold for your stove. Ensure it’s sturdy enough to hold the cement.
- Mix the cement: In a bucket, combine the cement mix with water according to the instructions on the package. Aim for a consistency similar to thick peanut butter.
- Pour the cement: Fill the molds with the cement mixture. Leave space in the center where you plan to create the stove’s combustion chamber.
- Add the metal mesh: Once the cement has set slightly, place the metal mesh inside to reinforce it and allow for better airflow.
- Allow to cure: Let the cement cure for at least 24 hours to ensure strength and durability. Make sure it’s in a dry area.
Finishing Touches
- Remove the molds: Carefully take off the outer molds once the cement has cured completely.
- Carve the opening: Create an opening at the back for feeding in wood and an air vent at the bottom for airflow.
- Test your stove: Before heading out, light a small fire with kindling and check for smoke. Adjust the air vent as necessary.
Tips and Tricks
To maximize your experience with using the rocket stove, consider these practical tips:
- Use seasoned wood: It burns cleaner and produces less smoke.
- Control the airflow: Adjust the air vents to regulate the intensity of the fire.
- Keep it clean: Clear out ash and residue after each use to maintain efficiency.
Common Mistakes
While building your rocket stove, be mindful of these common pitfalls:
- Rushing the cement drying time can weaken the structure.
- Using wet or unseasoned wood, leading to excessive smoke.
- Poor mold preparation, which can affect the final shape and sturdiness.
FAQ
Can I use regular concrete instead of a cement mix?
Regular concrete can be heavier and may not set as quickly. Using a quick-setting cement mix is recommended for easier handling.
How long will the stove last?
With proper care and maintenance, your cement rocket stove can last for several camping trips, making it a great investment for outdoor cooking.
Is it safe to cook directly on the stove?
Absolutely! Just ensure that the stove has a stable base and is on a flat surface when cooking.
Conclusion
Building your smokeless DIY cement rocket stove can transform your camping experience into a sustainable adventure. You’ll not only enjoy your meals without the smoke but also take pride in creating something with your own hands. What unique meals would you like to cook using your new stove? Share your thoughts in the comments!