The Secret to Starting Your Own Vermicomposting Worm Bin
The Secret to Starting Your Own Vermicomposting Worm Bin
Creating compost is essential for anyone interested in organic gardening, and one method that stands out is vermicomposting. Is this method the right fit for your gardening journey? In this article, you’ll discover what vermicomposting is and how to set up your own worm bin for effective composting at home.
What is Vermicomposting?
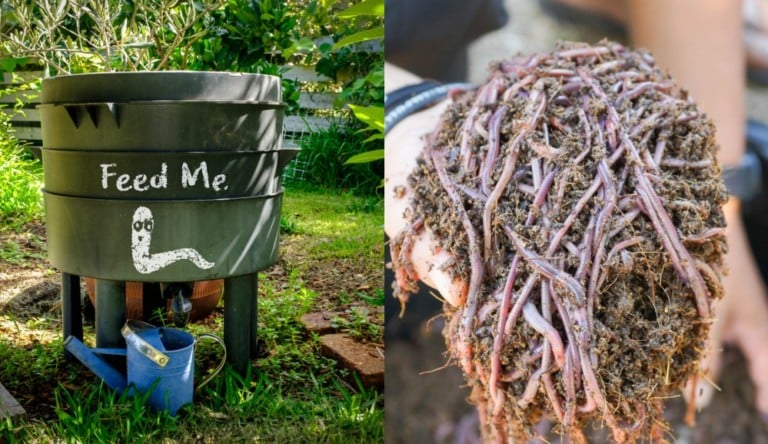
Vermicomposting is the process of using specific types of worms to break down organic waste into nutrient-rich compost. The term “vermiculture” refers to the cultivation of worms, while “vermicomposting” describes the use of these worms to create compost. The special worms used in this process excel at turning kitchen scraps and other organic materials into a fertile and friable compost. Typically, these worms are housed in a container known as a wormery.
Why Compost With Worms?
Composting at home offers numerous environmental and practical benefits:
- Nutrient Recycling: Composting allows you to return nutrients from kitchen scraps and garden waste back into the soil, helping your plants thrive.
- Waste Reduction: By composting, you minimize the amount of organic waste sent to landfills, reducing methane emissions produced from decomposing waste.
- Cost-Effective: Creating your own compost is more affordable than purchasing store-bought fertilizers.
- Improved Soil Health: Compost enriches the soil, enhancing its fertility and structure.
5 Reasons Vermicomposting Is the Best Type of Composting
When considering home composting options, here are five reasons vermicomposting is a top choice:
- Accelerated Decomposition: Worms consume organic matter and produce “worm castings,” speeding up the composting process.
- High-Quality Compost: The resulting compost is enriched with nutrient-dense worm castings, ideal for gardening.
- Aeration: Worms naturally aerate the compost, creating optimal conditions for aerobic decomposition.
- Adaptable Setup: Vermicomposting can be done indoors or outdoors, making it suitable for homes with limited space.
- Additional Benefits: Besides compost, wormeries can provide liquid feed for plants and a supply of worms for various uses.
Sourcing a Wormery
When selecting a wormery, you can either purchase a pre-made one or build your own. A popular choice is the Worm Factory 360 Worm Composting Bin, which includes multiple trays and a liquid collector tray:
- Four standard trays for easy compost collection.
- Expandable to eight trays for increased capacity.
- Includes accessories like a thermometer and digital manual.
Ensure good airflow and maintain a stable temperature within the wormery for optimal worm health.
Creating Your Own Wormery
Building a DIY wormery can be cost-effective and sustainable by repurposing materials. Here are some popular DIY ideas:
Where to Put Your Wormery
The placement of your wormery affects both worm health and your ease of access. Keep the following in mind:
- Ideal temperatures for worms range from 50 to 75°F (10 to 24°C).
- Consider avoiding extreme temperature fluctuations by placing your wormery in a stable environment.
- Make it easily accessible from your kitchen to streamline adding kitchen scraps.
Sourcing Worms for Your Wormery
Two common worm species for vermicomposting are Eisenia hortensis (European Nightcrawlers) and Eisenia foetida (red wigglers). You can order them online or check with local gardeners for availability.
How Many Worms Do You Need?
Most beginners start with about 0.5 kg (1 lb) of worms for an average-sized wormery. This quantity is enough to establish a viable population. Remember to handle the worms with care upon arrival for a smooth transition.
Preparing Your Wormery for the Worms
Before adding worms, ensure your wormery is ready with appropriate bedding. Use shredded newspaper or cardboard, but garden compost is ideal for initial bedding:
- Provide at least 8 inches of bedding material.
- Keep it moist but not overly wet to prevent anaerobic conditions.
Using Your Wormery
Start by adding small amounts of compostable scraps to the wormery, allowing the worms to adjust. Maintain balanced layers of “green” (nitrogen-rich) and “brown” (carbon-rich) materials to optimize decomposition.
What Not to Add to Your Wormery
Avoid adding non-biodegradable items or organic waste that can introduce pathogens. Common no-nos include:
- Meat, fish, and dairy (unless fermented first).
- Tough, woody materials that decompose slowly.
- High quantities of citrus or onions, which can alter pH levels.
Troubleshooting Your Vermicomposting System
Monitor for signs of distress in your worms, like attempts to escape or unpleasant odors. Check for:
- Temperature balance.
- Moisture levels.
- Proper compost ratios and aeration.
When the Wormery Section is Full
If using a multi-section wormery, simply add a new section when the current one is full. Allow the worms to migrate into the new section at their own pace, making harvesting compost easy!
Conclusion
Vermicomposting is a rewarding and efficient method of turning kitchen scraps into nutrient-rich compost. By following these steps to establish your wormery, you’ll contribute to a more sustainable ecosystem while enhancing your gardening endeavors. Enjoy the ongoing benefits of composting with the help of your wriggly friends!