Easy Ways to Create a Self-Watering Strawberry Pot
Easy Ways to Create a Self-Watering Strawberry Pot
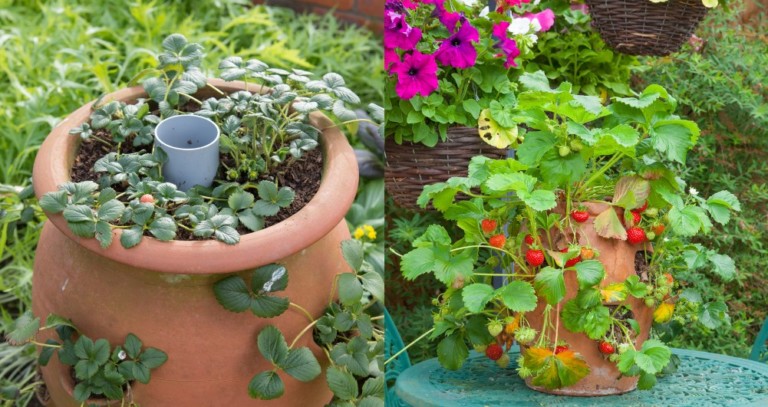
Planting strawberries in a strawberry pot can be a rewarding experience, but watering them efficiently can pose a challenge. If you’ve struggled to maintain moisture in your pot, you’re not alone! This guide will walk you through creating a simple, DIY self-watering system that ensures your strawberries thrive without the fuss.
Why Use a Self-Watering Strawberry Pot?
Strawberry pots are a fantastic way to maximize space while growing multiple plants. However, traditional watering methods often leave the lower plants undernourished. This DIY solution guarantees that each plant gets the hydration it needs without making a mess.
What You’ll Need
Supplies
- 3/4″ PVC Pipe, approx. 2 feet long
- Strawberry Pot (alternatively, a fabric strawberry planter works well too)
- Potting Soil
- Sharpie Marker
Tools
- Power Drill
- 5/32″ drill bit
- Hand Saw
Steps to Create Your Self-Watering System
Step 1: Measure
Insert the PVC pipe into the empty strawberry pot, ensuring it reaches the bottom. Center the pipe and mark it with a Sharpie approximately 1/2 inch shorter than the pot’s lip.
Step 2: Cut
Lay the pipe horizontally on a sturdy surface and cut it at the marked line using a hand or electric saw.
Step 3: Mark Holes
Using the Sharpie, mark dots on the pipe for drilling holes spaced every two inches from top to bottom, staggering the positions for each row. This ensures even water flow to all sides of the pipe.
Step 4: Drill Holes
Position the pipe flat on your work surface and drill holes at each marked spot using the power drill and 5/32″ bit. Clear away any plastic debris after drilling.
Step 5: Start Planting
Get assistance for this step if needed. It’s crucial to keep the pipe centered in the pot while adding soil. Place the pipe in the center and begin pouring potting soil around it, stopping when you reach the first set of planting holes. Cover the top of the pipe with your hand to prevent soil from getting inside.
Insert the strawberry plants, ensuring their leaves and stems poke out of the holes. Add more potting soil carefully, keeping the pipe centered and clear of soil, until the pot is full.
Step 6: Water
Your DIY watering system is ready! Pour water into the top of the pipe using a watering can or a hose. Initially, the pipe may fill quickly, but it will drain just as fast, allowing water to reach the lower plants. With practice, you will find the right speed to maintain an optimal flow.
For the first week, water daily or every other day until the roots are established. After that, remember to water at least once a week or when the top layer of soil feels dry.
Conclusion
Creating a self-watering strawberry pot is not only simple, but it also enhances the growth of your strawberries while minimizing cleanup. With just a few materials and some straightforward steps, you can enjoy a successful strawberry garden. Happy planting, and enjoy the fruits of your labor!
More Strawberry Gardening Tutorials & Ideas
- How To Plant a Strawberry Patch That Produces Fruit For Decades
- 7 Secrets for Your Best Strawberry Harvest Every Year
- 15 Innovative Strawberry Planting Ideas For Big Harvests In Tiny Spaces
- How To Grow New Strawberry Plants From Runners
- 11 Strawberry Companion Plants (& 2 Plants To Grow Nowhere Near)
- 10 Fantastic and Unusual Strawberry Recipes that go Beyond Jam