Root Rose Cuttings in 3 Easy Steps Using Potatoes for Gorgeous Blooms! 🌹✨
Root Rose Cuttings in 3 Easy Steps Using Potatoes for Gorgeous Blooms
- Introduction
- Required Materials
- Preparing the Cuttings
- Planting the Cuttings
- Common Mistakes
- FAQ
- Conclusion
Introduction
Seeing a garden full of vibrant roses brings joy to many homeowners, but the thought of propagating them might feel overwhelming. You may find yourself wondering how to successfully root rose cuttings, especially if you lack prior experience. The idea of utilizing potatoes for this process may seem unusual, yet it can simplify your tasks and lead to stunning results. Let’s explore how you can achieve gorgeous blooms straight from your garden.
Required Materials
To successfully root rose cuttings using potatoes, gather the following materials:
- Healthy rose cuttings – Select stems that are around 6 inches long with at least two sets of leaves.
- Potatoes – Choose firm, healthy potatoes for holding the cuttings. The starch helps nourish the cuttings.
- Pots or containers – Use pots that have drainage holes to prevent waterlogging.
- Potting soil – A good quality potting mix ensures proper aeration and moisture retention.
- Water – Essential for hydration during the rooting process.
Preparing the Cuttings
Taking care in preparing your rose cuttings is critical for their success. Follow these steps to ensure optimal conditions:
- Choose your cuttings – Look for healthy stems, ideally taken from mature plants. Remove any lower leaves.
- Make the cut – Use clean, sharp pruning shears to cut just below a node; this is where new roots will develop.
- Dip in rooting hormone – Optional, but dipping the cut end in rooting hormone can increase the chances of successful rooting.
Planting the Cuttings
After preparing your rose cuttings, it’s time to plant them. Here’s how:
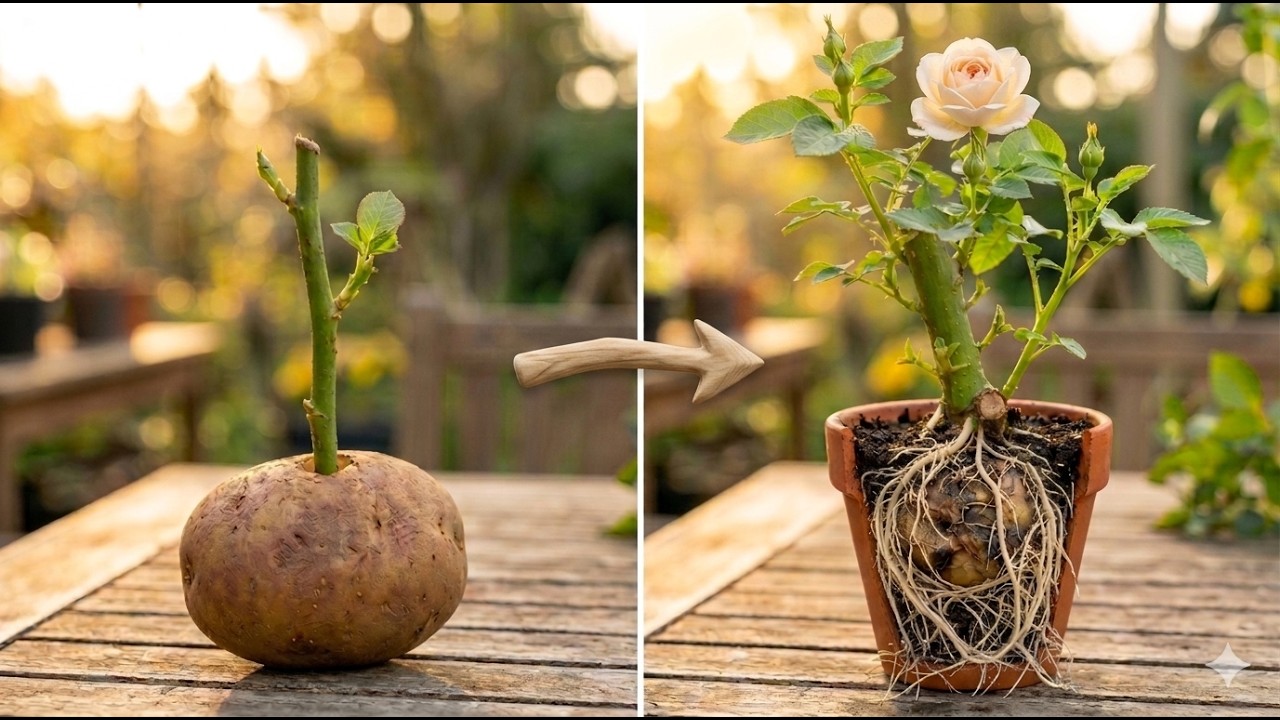
- Prepare the potatoes – Cut a slit into each potato and gently insert the rose cutting into the slit, ensuring the cut end is buried.
- Place in pots – Fill your pots with potting soil and water lightly, then place the potato with the cutting upright in each pot. Make sure it’s secure.
- Watering and sunlight – Water the soil until it’s evenly moist and place your pots in a spot with indirect sunlight. Too much direct sun can stress the cuttings.
Common Mistakes
Even seasoned gardeners can stumble while rooting rose cuttings. Avoid these common pitfalls:
- Using damaged cuttings – Always select fresh, healthy stems for better rooting success.
- Overwatering – Too much water can lead to rot. Ensure the soil is damp but not soggy.
- Neglecting humidity – Roses thrive in humid environments. Consider covering pots with plastic to maintain moisture.
- Ignoring light conditions – Placing cuttings in direct sunlight can hinder rooting; they need bright, indirect light.
FAQ
How long does it take for rose cuttings to root? Most rose cuttings will start developing roots within 2 to 4 weeks, depending on the environment and care.
Can I use any type of potato? While most potatoes can work, choose firm, healthy ones without any shriveling or blemishes.
What should I do if the cuttings don’t root? If your cuttings fail to root, review your materials and conditions. Adjusting light, moisture, or temperature can help.
Conclusion
Rooting rose cuttings using potatoes is a practical and effective technique for bringing new blooms to your garden. By taking care with your cuttings and following best practices, you can enjoy a thriving display of roses. Have you tried propagating roses before, and what methods worked for you? Share your thoughts in the comments!