7 Simple Steps to Grow Gorgeous Roses in Water – Try This Easy Propagation Method!
7 Simple Steps to Grow Gorgeous Roses in Water
- Introduction
- Why Propagate Roses in Water?
- Required Materials
- Step-by-Step Guide
- Common Mistakes
- FAQ
- Conclusion
Introduction
Picture this: you’ve received a beautiful bouquet of roses, their vibrant colors capturing your attention. After a few days, the blooms begin to wilt, leaving you wondering what to do with the remaining stems. Few realize that these discarded stems can potentially flourish into new, stunning plants with the right technique. By focusing on growing roses in water, you open the door to endless possibilities for your garden. Continue reading to find out how to make the most of those lovely stems.
Why Propagate Roses in Water?
When considering ways to expand your garden, propagating roses in water offers numerous benefits:
Benefits of Water Propagation
- It’s a simple and cost-effective way to grow new plants.
- You can easily monitor root development.
- There’s no need for soil, making it less messy.
Suitable Rose Varieties
While most roses can be propagated in water, some varieties perform exceptionally well, including:
- Hybrid Tea Roses
- Floribunda Roses
- Climbing Roses
Required Materials
Before you begin, gather the following materials:
- Clean glass jars or vases to hold the water.
- Sharp scissors or pruning shears for cutting the rose stems.
- Room temperature water to assist the roots in developing.
- Optional: a few drops of liquid fertilizer for additional nutrients.
Step-by-Step Guide
1. Choose the Right Stems
- Select healthy stems that are 6 to 8 inches long.
- Look for stems that have no signs of disease or pests.
2. Make a Clean Cut
- Cut just below a node. This is the area where leaves emerge and roots will eventually grow.
- Remove any leaves that will be submerged in water to prevent rot.
3. Place in Water
- Fill your jar or vase with room temperature water.
- Insert the cut stem into the water, ensuring that at least one node is submerged.
4. Find the Perfect Location
Place your jars in a location with indirect sunlight and a stable temperature. Avoid putting them in direct sunlight, as this can cause excess heat and evaporation.
5. Monitor Water Levels
Check the water levels regularly. Refill the jars as needed, ensuring that the nodes remain submerged. If using fertilizer, be careful not to overdo it; a little goes a long way.
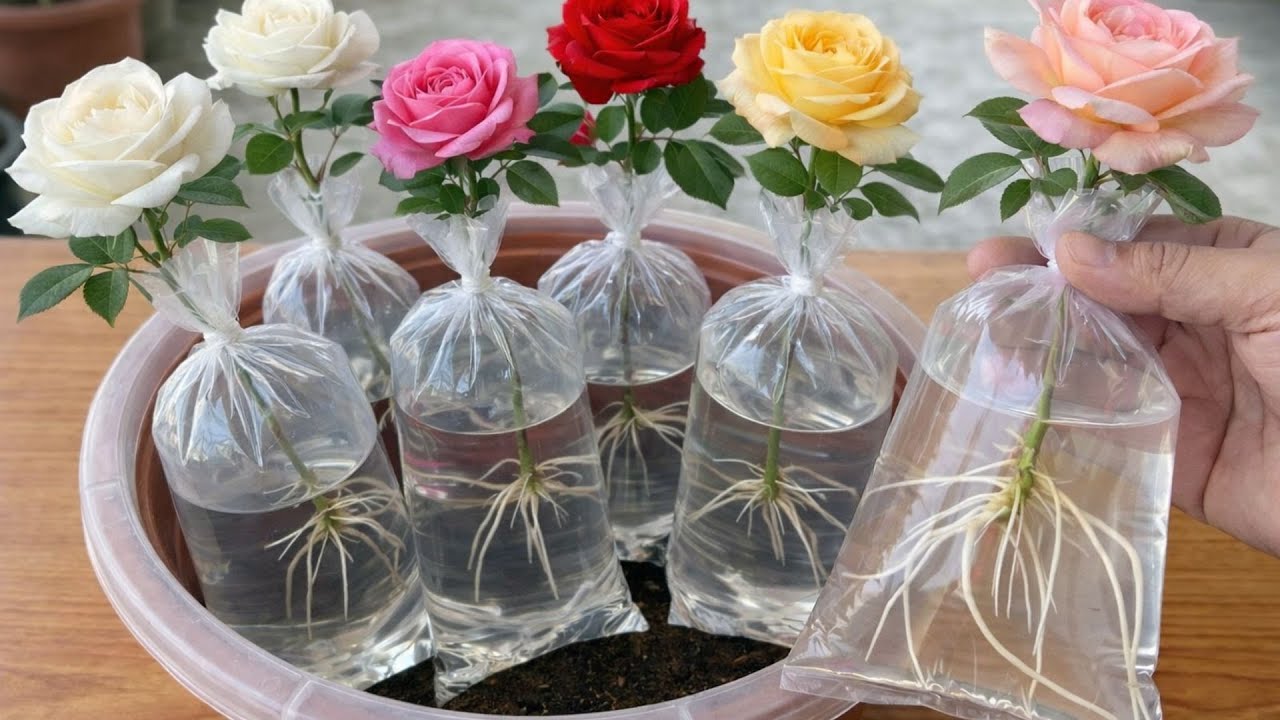
6. Look for Root Growth
In about two to four weeks, you should start to see tiny roots developing. Continue this process until the roots are at least 2 inches long.
7. Transplant the Roots
- Once the roots are established, transfer your new rose plants to pots with soil.
- Keep them watered and gradually introduce them to more sunlight.
Common Mistakes
Even experienced gardeners can make errors in the propagation process. Here are some mistakes to avoid:
- Using stems from wilted flowers, which have a lower chance of rooting.
- Placing the cut stems in direct sunlight too soon, causing stress to the plant.
- Over-fertilizing the water, which can lead to nutrient burn.
- Neglecting to change the water regularly, which can introduce bacteria.
FAQ
Can all types of roses be propagated in water?
While many rose varieties can be propagated in water, hybrid teas, floribundas, and climbing roses tend to perform better in this method.
How long does it take for rose cuttings to root in water?
Roots can start to appear in as little as two weeks, but it can take up to a month for them to become established.
What should I do if my rose cuttings aren’t rooting?
If your cuttings aren’t rooting, ensure that you are using healthy stems and check that the water is clean and at the proper level.
Conclusion
Growing roses in water is a rewarding way to expand your garden without the mess of soil. By following these simple steps, you can turn your leftover stems into beautiful plants. Have you tried propagating roses before, or do you plan to give it a go? Share your experiences in the comments below!